ShareThis

Showing posts with label Long Arm Quilting. Show all posts

Star Quilt

 Thursday, May 15, 2014

One of the blogs that I follow, "Sewing by Moonlight", by Em had asked for help to finish a quilt for her dad who has cancer.  She had a very short period of time in which to work with and she wanted to give this quilt to her dad for his birthday.  She asked for volunteers to help her make some of the squares as well as help from a long arm quilter that would quilt it for her due to its large size.  I thought this would be a perfect opportunity for me to be able to practice my quilting.  In addition, I had never quilted a quilt that was that large and I really wanted to try that.  Em and I connected and she sent me the quilt several weeks ago now.  I quilted it up for her in a free motion loops and stars pattern.  I am so happy with how it turned out.  Here is a picture of the entire front of the quilt.


A picture of the back of the quilt.  This is the very first time I worked with a pieced back.  I was nervous at first, but I think it turned out beautiful!


Em did a really great job piecing this together, which makes my job easier as a long arm quilter.  I think it turned out great.  Here are some closeups of the quilting.


Quilt Stats:
  • Size 60in x 72in
  • 5 bobbins
  • Quilting time was 4 1/2 hours.  
Linking up to Needle and Thread Thursday hosted by Kelly at My Quilt Infatuation.  


Happy Quilting!

Read more...

Modern Mini Challenge with Ellison Lane Quilts

 Sunday, June 16, 2013

I usually don't have time to enter quilt challenges.  Big surprise.  However this particular challenge is just for a mini quilt.  I figured that I had enough time to be able to handle this.  The challenge is being hosted by Jennifer at Ellison Lane Quilts.  The deadline for your entry is 5:00 pm June 16th and I just made it.  Whew!


I have been taking Camille Roskelley's Craftsy Class called Pre-cut Piecing Made Simple.  Like I told you in my last blog post, piecing quilt tops is my least favorite part of the quilting process.  I have been quilting for a long time now, but never really tried other piecing techniques such as triangles, star blocks, etc.  I have always admired Camille Roskelley's quilt tops for their accuracy and she also designs patterns too, so when I heard that she was teaching a Craftsy class where she shares her tips and tricks I knew I had to purchase it.  I just finished up lesson 5 on half square triangles and I decided to make my mini quilt using half square triangles in one of the block formations that she recommended in the class.  I just loved this block formation after she demonstrated it and I had the perfect charm pack to use for it.  It is Summersville by Lucie Summers for Moda Fabrics.  It has such cute and fun summery prints.  I wanted a small little table topper for my dining room table and this was going to be perfect.


I must say that I love half square triangles now.  They really are fun and easy to make.  Plus the versatility of them is great.  You have so many options to place them in different patterns to get different looks!  


In the class, Camille pieces her charm pack squares with white, but I wanted to use black.  It seems everyone is using white lately, but I prefer black!  My family must be more "dirty" then everyone else's and I have two girls!  Anyways, here is the finished mini quilt top before quilting.


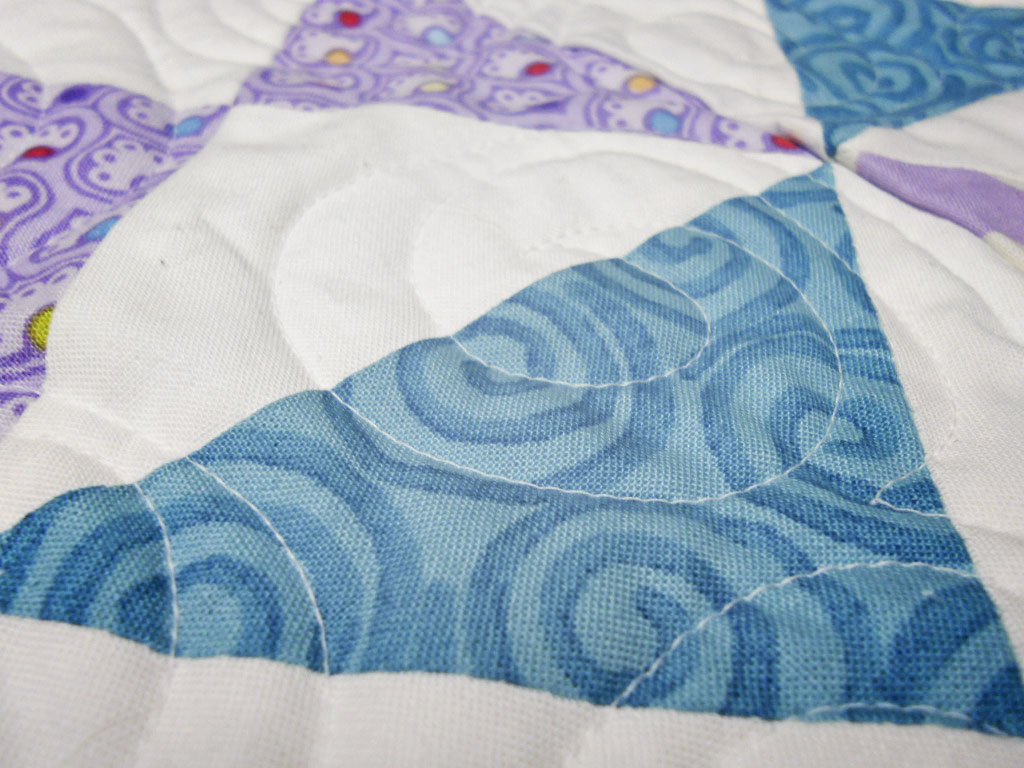
And after quilting.  I quilted a spiral flower that I have been working on in the center of the block.  Next in the black square outline, I took cues from the fabric and did loops all the way around the square.  I left the printed fabrics empty thinking they would really pop.  However, I kind of wish that I would have done a different quilted filler for the fabric prints but I would have had to use cream on top and black on bottom because my backing fabric was black.  When you use such contrasting threads, it usually doesn't work out the greatest, so I didn't attempt it.  Overall, I am happy with how it turned out.


Quilt Stats:
Fabric:  "Summersville" by Lucie Summers for Moda Fabric, the binding is made out of the Chevron print from Sweetwater's "Mama Said Sew" collection, and the backing fabric is Kona Black.
Quilting:  Spiral flower in center, and loopy quilting in the black square outline.  Quilted by me.
Thread:  Superior So Fine #50 in black on both the top and bottom.  This actually worked out the best because I usually have problems using this thread for the top, but using it in the bottom as well worked great!
Finished Size: 14 inches by 14 inches
Pattern:  Camille Roskelley's Craftsy Class "Pre-cut Piecing Made Simple"

Also linking up with Plum and June Let's Get Acquainted Linkup.

Also don't forget to visit this week's bloggers for the "2013 New Blogger's Blog Hop".  List is shown below.

Friday, June 21st
Leigh Anne @ Ella's Cottage
Stacey @ The Tilted Quilt
Sarah @ Quilt Candy
Jackie @ NW Patchwork
Erica @ Happy Fabric
Stephanie @ Simple Sewendipity
Lauren @ Seraphym

Happy quilting!

Read more...

Family Tree Quilt - A Finish!

 Tuesday, May 28, 2013

I am so excited to have finally completed the Family Tree Quilt for my mother in law.  I must admit this was a very challenging quilt to do.  My sister in law and I pieced the top together, but it was my job to quilt and bind it.  I really did struggle with how to quilt it.  I just didn't want to "screw it up".  This quilt was a very big deal to our family.  My father in law passed away a year ago last May (2012) now making this family tree quilt even more precious.


For a lot of the quilting designs, I used Natalia Bonner's book, "Beginner's Guide to Free Motion Quilting", which can be purchased here.  I quilted swirls in the blue areas only because I don't have a lot of confidence with feathers just yet.  I did buy Angela Walter's Craftsy Class called "Free Motion Quilting with Feathers", but I just haven't had time to take it yet.  I was pretty happy with how the swirls turned out, but I would really like to have them build off of each other a little more like I have seen on some of the other blogs.


My favorite quilting were the tree branch parts.  I used Natalia's "flame" technique and then added "knots" to make it look more "tree-y" for lack of a better word.  My sister in law kept saying that our "tree" looked more like a bush, but how many bushes do you know have "knots" in the stems?  None I hope.  So I must admit that I really really like how this quilting made our tree more like a tree and not a bush!


In the area that represented the leaves, I quilted a meandering loops and leaves.  This was a lot of fun to do and I also really like how this turned out.  I must say I quilt much better than I draw because I did practice drawing out the designs a couple of times before I quilted them, so thank goodness for that because I was getting a little worried while I was "drawing".


All in all I am very happy with how it turned out and am so glad that it is finally finished.  I am linking up with "Sew Cute Tuesday" hosted by Janice.


Quilts Stats:
  • Fabric was just some batiks that we found our our local quilt shop.  The brown we used was a Kona solid, but I don't know the exact name of it.  
  • The pattern was something my sister in law and I made up.  
  • Quilting was done by me on my long arm.  
  • We started it towards the end of January 2013 and I finished it mid-May 2013.  
  • The size is approximately 36 inches by 52 inches.  
Happy Quilting!

Read more...

April Goal - Not a Finish

 Wednesday, May 1, 2013

Well I was bummed that I wasn't able to finish my April Goal, which was quilt the family tree quilt and bind it.  However, to my defense I was having machine problems that I couldn't quite figure out.  I would have the tension all set to where things should be (yea) and then periodically it would create a loose stitch and I wasn't even going over a seem or anything.  Then underneath the machine would periodically create these loopy things and it was driving me nuts!  I just couldn't figure it out and was getting extremely frustrated with it.


Just so you know it is definitely not suppose to do this.  So I had the person who sold me the machine over and she tweaked the bobbin and completely took apart my tension knob and put it back together.  She also fixed my frame, which I guess was extremely loose and showed me how to adjust that as well.  All in all after about an hour of tweaks and adjustments, my machine started to do this...


Now that is what I am talking about.  I hate to be a perfectionist, but I like "perfect stitches".  This may be the death of me one day, but this is how I want my quilting to look.  

So now I am finally quilting my mother in law's quilt.  I am switching between two top threads Superior King Tut 983 (brown) and 903 (blue), and they are both variegated.  I like the look it is giving the quilting.    

Here are my swirls, which are going in the "blue portion" of the quilt, only because I really can't do feathers that well yet.  I am doing a more bouncing around swirl, which I want to practice making a little denser.  I am currently taking one of Angela Walter's Craftsy classes, which can be purchased here.  She does a couple different versions of the swirl and I am doing the bouncy one at this point, but definitely want to move up to the denser one because I kind of like that better.  I am on lesson #7 out of 10, so I consider my swirls a work in progress.  


In the branches, I am doing the "flame" technique that you can find in Natalia Bonner's book called "Beginner's Guide to Free Motion Quilting", which can be purchased here.  I think this is my favorite part of the quilt so far.  

In the leaf area, I am quilting loops and leaves, which is also from Natalia Bonner's book that I mentioned above.  

My plan is to get this quilt finished up this week!  

Linking up to WIP Wednesday link party hosted by Lee at Freshly Pieced.


Happy Quilting!

Read more...

February Goal - Update

 Wednesday, February 13, 2013

My sister in law and I were able to finish the quilt top for the Family Tree Quilt.  We were very excited to finally have it completed.  We wish we would have done hourglass blocks down at the bottom of the quilt where you see the plain blue but at that point we just wanted to get it finished.  We presented it to my mother in law over the weekend and thankfully she loved it.  Here is a picture showing the entire quilt top.


My plan is to get it loaded on the long arm this week to get it quilted.  I purchased this great book by Natalia Bonner called "Beginners Guide to Free Motion Quilting", which can be purchased here.  It is an amazing book because it actually shows you how to quilt the designs.  I am going to try out several of her designs on this quilt.  This quilt will also be the first time that I do some "ruler" work as well.  I must say I am a little nervous to quilt this because the "whole" family paid for the supplies for my sister in law and I to make it, so in a way, it kind of feels like my first customer quilt.  Here are a couple of additional pictures showing different parts of the quilt close up:


The above is a pic of my mother and father in law.  My father in law passed away last May, so this is just one more reason why this quilt is so special.  


I was pretty impressed that it actually does look like a tree, so hopefully my quilting will make it look even more like a tree!  Wish me luck!

Linking up to WIP Wednesday link party hosted by Lee at Freshly Pieced.


Happy Quilting!


Read more...

January Goal - A Finish!

 Tuesday, January 29, 2013

I am so excited because I actually finished my first goal for January!  It was a close finish, but a finish none the less.  My long arm quilting machine broke down on me and had to go to the shop, so it was out for a week.  I got it back last week and after a couple of "quilting headaches" I was able to actually get the quilt quilted and bound over the weekend.  Man was that spa trip over the weekend well deserved!  So let's get to the pictures shall we!


I quilted a spiral pantograph on it, which was a little bit difficult at times with all the seams.  Some of my seams were pretty heavy so that was actually an excellent learning experience for me.  For the most part it turned out pretty good.  I was happy with it.  It was my first time doing this pantograph on an actual quilt top and not on a plain piece of fabric.  I must say that I agree with Abby from Latimer Lane and you do get better with the pantograph the further you get to the bottom.  I will try to practice this more though, so my top will look like my bottom in the future!  I forgot to show you a picture of the finished quilt before quilting, so that is shown here below:


Here is a picture of the entire quilt all quilted up.  I must say I just love how much texture quilting gives a quilt.  I just love that crinkle bumpy feeling.  


I also did a different binding treatment on it.  I added a brown ric rac which I have never done before.  You can see a better pic of that below, but if you would like a good tutorial on this that I used, I got it from here on Bee in My bonnet's blog.  She does an excellent job on explaining how to do it, so I highly recommend you check it out.  I think it looks so adorable on a "girly" quilt.  


Quilt Stats:
Pattern: Hourglass Quilt you can find the tutorial here on Cluck Cluck Sew's blog
Fabric: Calm Curiosities by Nancy Halvorsen and Moda Bella Solid in Brown
Thread: Superior So Fine and Bottom Line in White
Pantograph: Denise's Spirals

Well there you have it, my January goal finished!  Even before the baby is here!  Double yay!

Linking up to 2013 - A Lovely Year of Finishes hosted by Fiber of All Sorts.
Happy Quilting!


Read more...

Pantograph Lesson

 Wednesday, January 9, 2013

I am so excited, but this Friday, I am getting my first pantograph lesson.  I was actually able to put together the laser light and put it on the machine, which made me feel very good.  I have been practicing a pattern, but I am currently just leaving the machine turned off until I actually have someone show me how to line up the start of the quilt with the pantograph and how to advance it.  Unfortunately, I don't have anything to actually show you except the pattern that I have been tracing.  The pattern that I have been practicing is called "Denise's Sprials" shown below:


I am so excited to quilt this for real instead of in thin air.  The first "official" quilt that will get this treatment will be my teal and purple hourglass quilt, so I had better get this stack of blocks sewn up this week!  


Don't you think this pattern will look great on this quilt?  Especially after seeing the fabric above with it's spirals, I know this would be the perfect quilting for this quilt!  

Linking up to WIP Wednesday link party hosted by Lee at Freshly Pieced.


Happy Quilting!


Read more...

Santa's Workshop

 Wednesday, December 19, 2012

Have you ever felt as though you are a part of Santa's workshop?  I do and I must say that I love it.  I must be crazy, but I just love making Christmas presents.  The only thing that I wish that I would do is start sooner, but one of these years I will be more organized!  I just finished up a Christmas stocking for my daughter's Kindergarten school teacher shown below:


And now I have started an assembly line to quilt up 4 superhero stockings for my daycare lady's family.  Talk about fun and each stocking is getting easier as I go along.  Thank goodness!


My daycare's family is obsessed with wonder woman and superman, so I thought I would make stockings for the entire family using this theme.  They even painted their camper superman colors!  So I think my choice is safe.  I can't wait to show you the finished product this weekend.  I should have them done by then.  

Linking up to WIP Wednesday link party hosted by Lee at Freshly Pieced.


Happy Quilting!


Read more...

Designed by HotBliggityBlog

Back to TOP